Using Conda
When using Datalabs the recommended way to install packages is through use of Conda. This is a flexible package/library management tool that can be used to install dependencies across multiple languages and platforms (for more information see https://docs.conda.io/en/latest/).
One of the key aspects that using Conda allows is the storing of all project dependencies (including but not limited packages, binaries & libraries) in one place which can be stored with your code. This is key because as Datalabs is hosted on Kubernetes, (which is a platform that allows for workloads or Notebooks to be created, moved or deleted easily) it's important to ensure that any custom packages that get installed are persisted without having to re-install whenever a notebook is restarted.
The guide below will walk through setting up your environment. This will only be required when either starting a new project or creating a new Conda environment.
New Project From Scratch
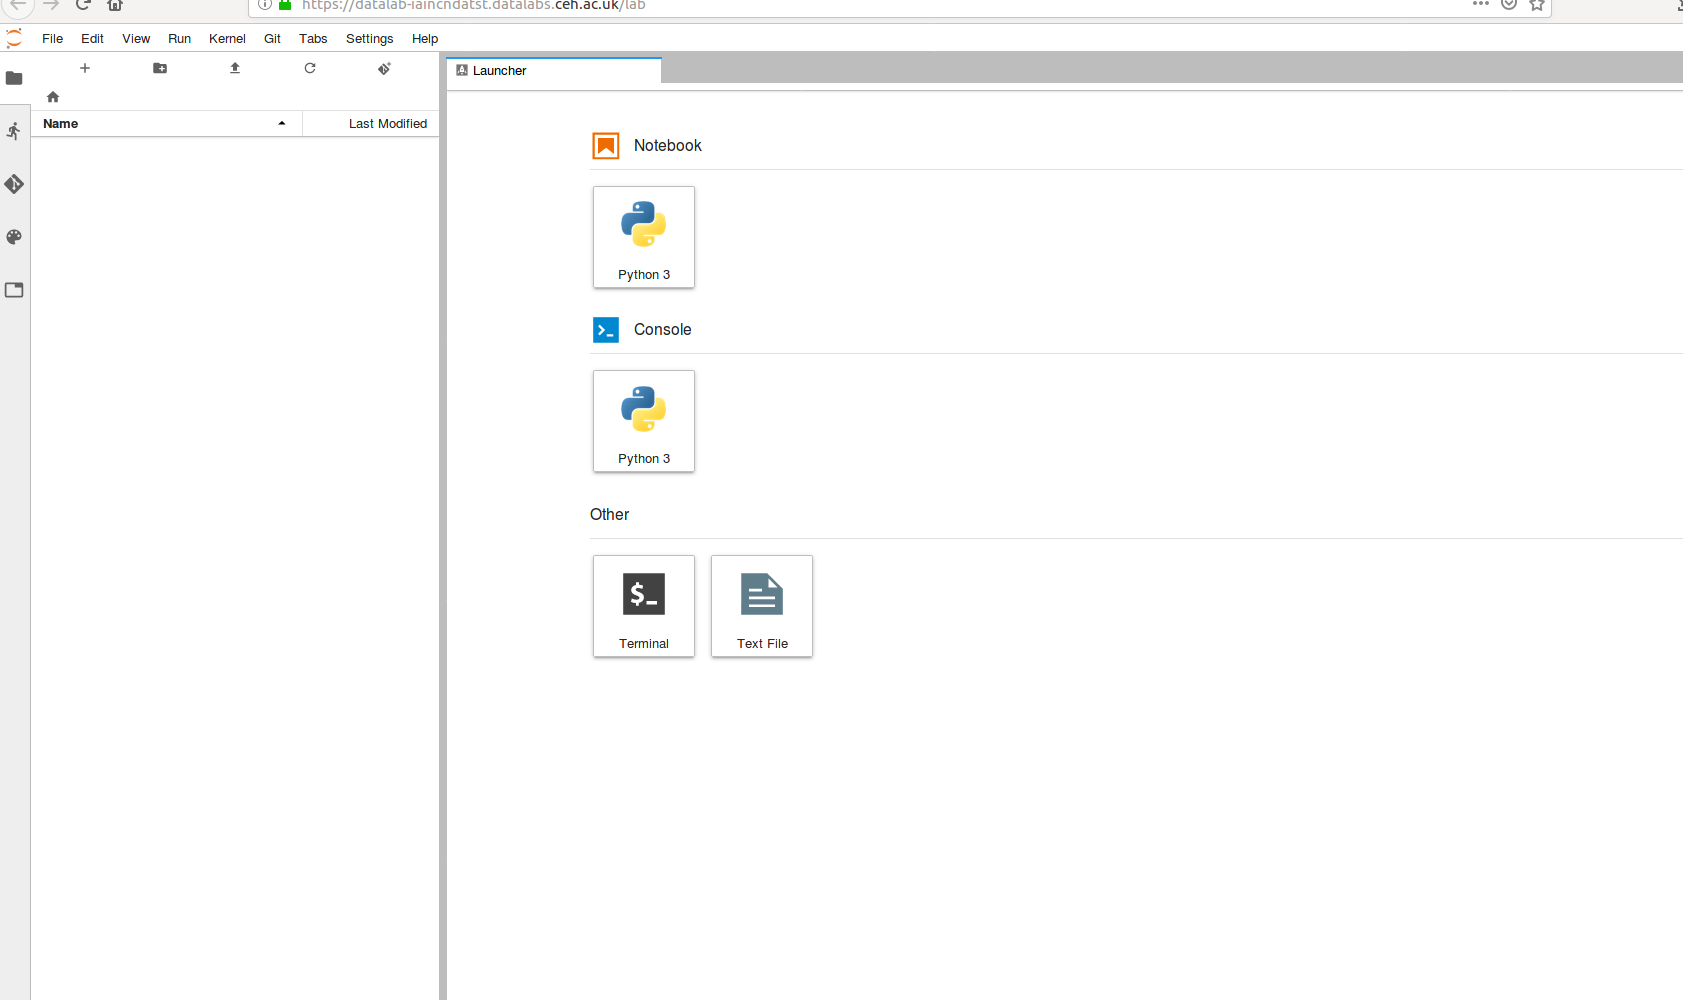
The first time you access a Jupyter notebook within a new project, the screen will look like below. There will simply be the default Conda kernel that is deployed with the image.
The default Kernel Notebook/Console that appears termed "Python 3" should not be used for project work within DataLabs, this is because if others that are also using the same notebook make changes to the default environment (installing or removing packages) this could break other projects from running, but also because the changes that are made within this environment will not be persisted when the JupyterLab version is updated over time, or changes are made to the underlying platform.
Instead, we recommend the use of Conda environments, which can be stored alongside the project data and code itself, this process is documented below (and see here for some of the advantages of using Conda environments - https://medium.freecodecamp.org/why-you-need-python-environments-and-how-to-manage-them-with-conda-85f155f4353c ).
Conda Environment Creation
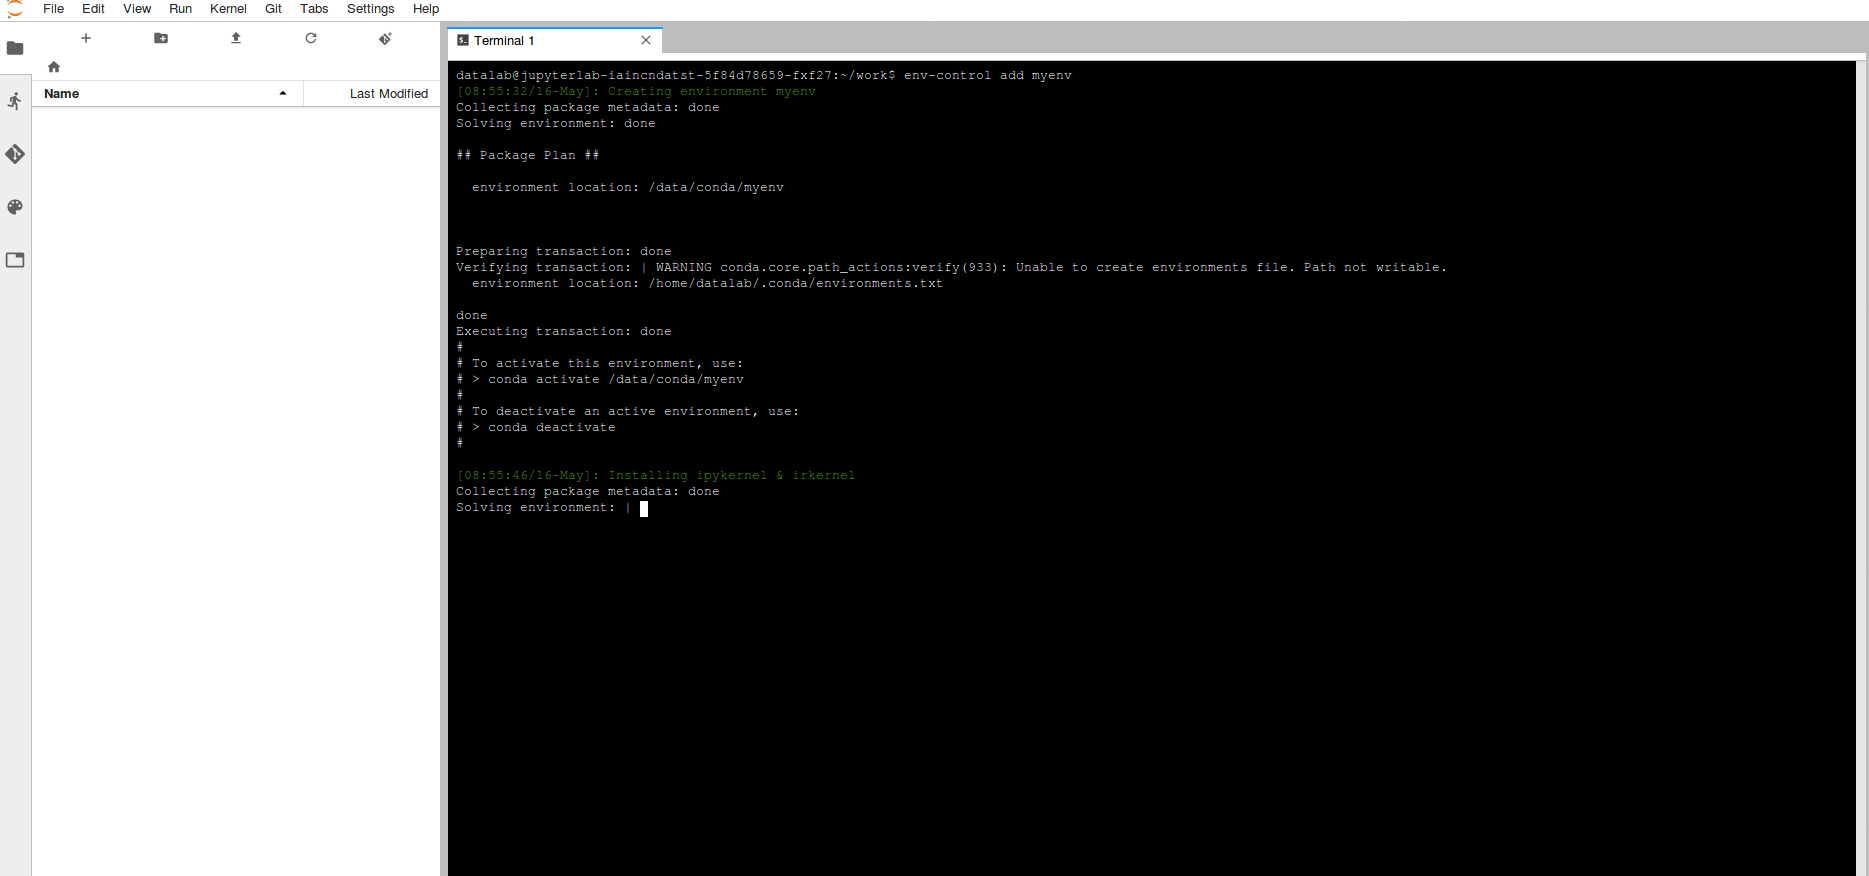
In order to create an environment (this is only required once), select terminal and run the command below, it's a good idea to name your environment something related to the purpose of what you're doing.
| Code Block | ||
|---|---|---|
| ||
env-control add <environment_name> |
This will trigger the creation of a Conda environment as well as adding Jupyter Kernels for both R & Python which are stored on your data volume. Note: When creating a Conda environment a number of packages are installed by default, which may take ~10 minutes to run).
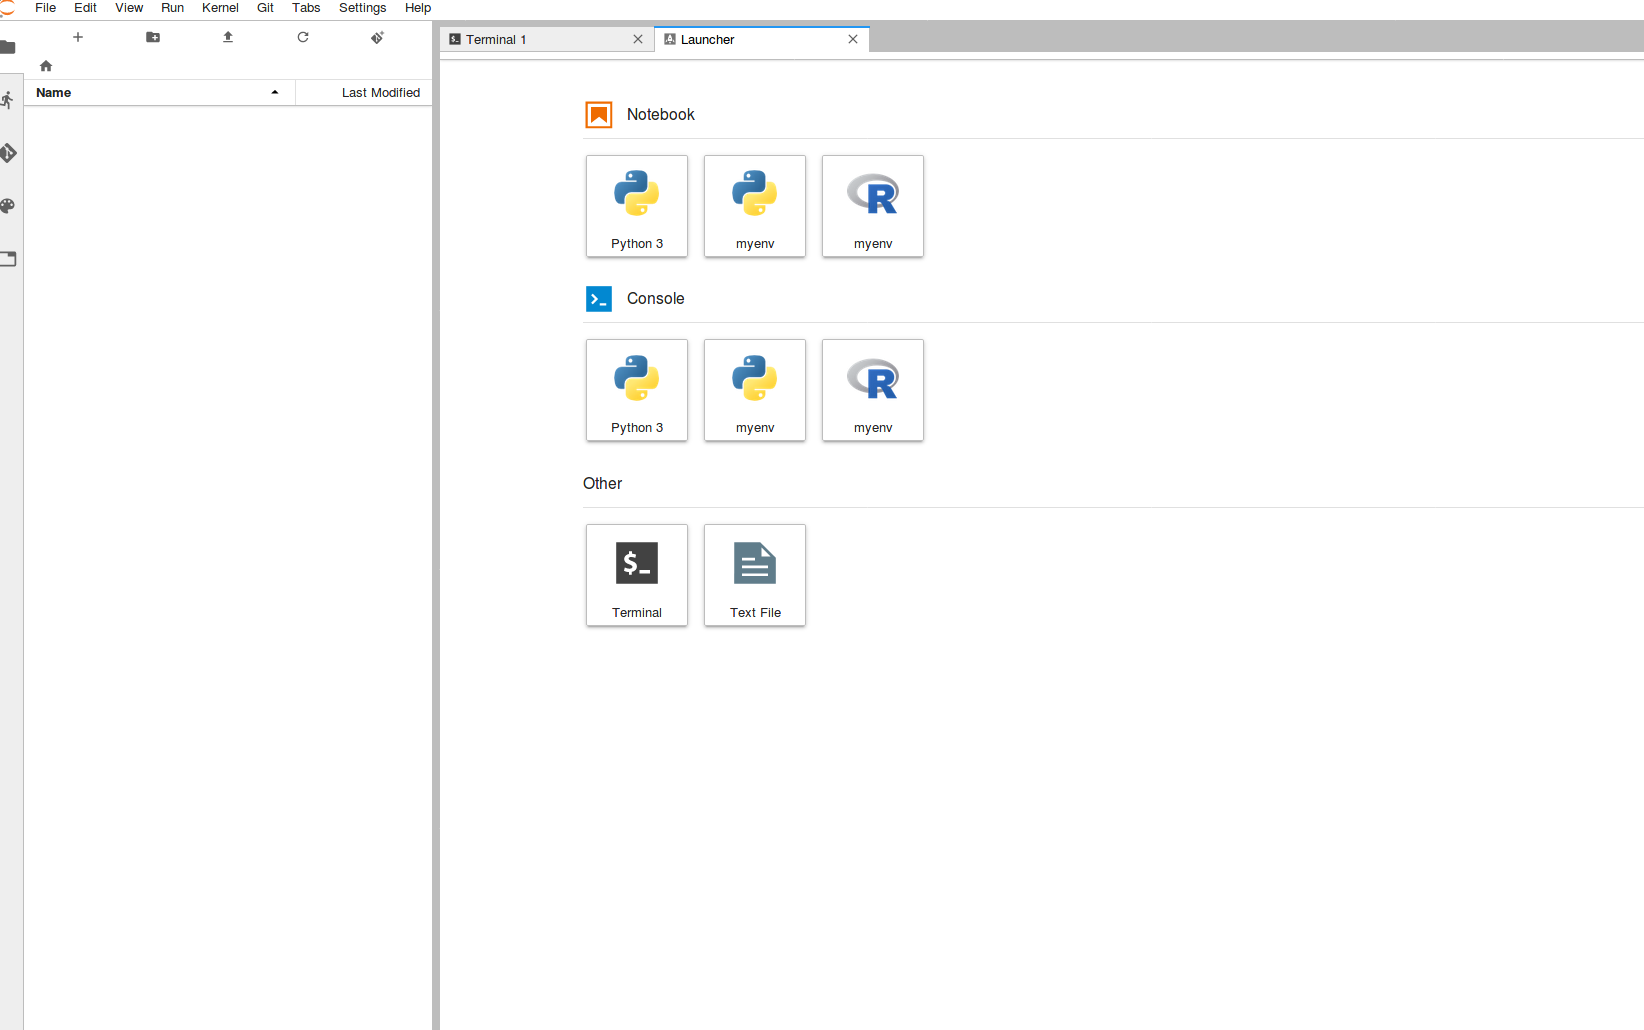
Once complete, if you refresh the page, there should now be two additional Kernels available from the main screen. These correspond to newly deployed python & R versions within the created environment.
These Kernels can now be used in any notebook or console session. In order to install packages/libraries see the Adding/Removing packages page.


